New 450 Canopy

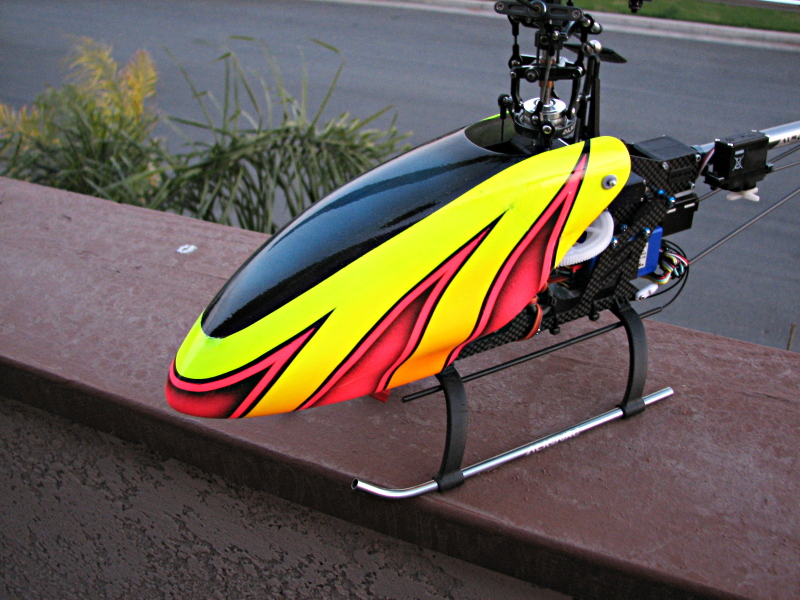
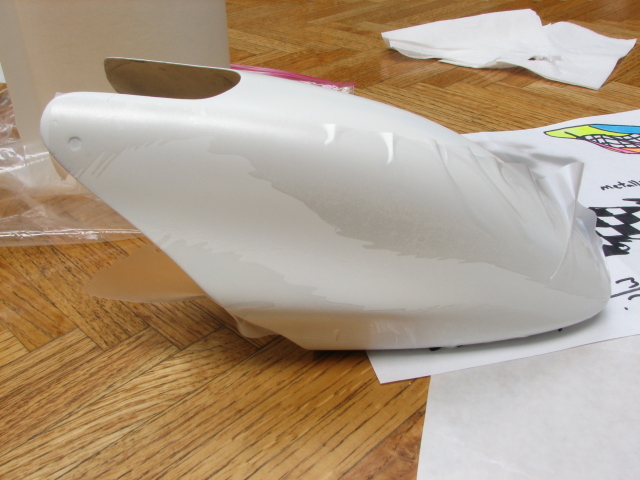
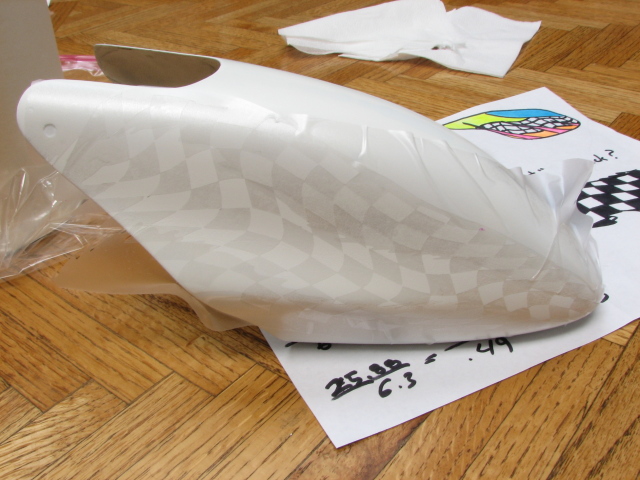
I just finished painting another canopy for my 450's. I planned for so much more than what resulted, but after having problems with paint peeling up, I finished it up with minimal masking and had to leave it fairly simple looking. I think one of my primer coats was laid on too thick ... too late to do anything about it now :(

Anyway, I took pictures as I progressed, so here they are:

This is what I did:

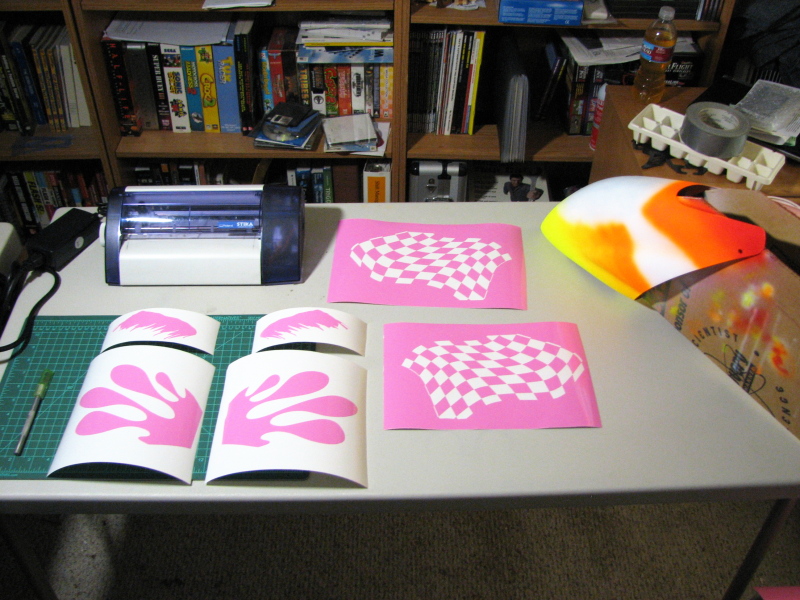
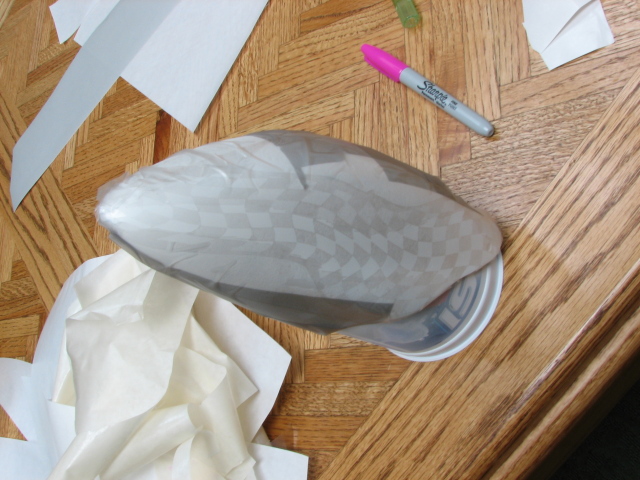
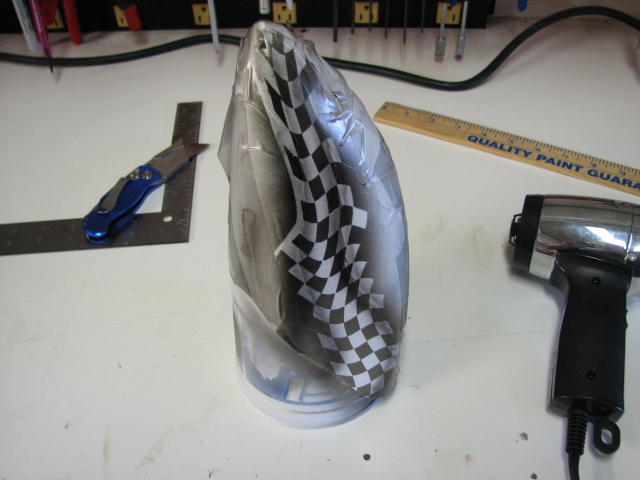
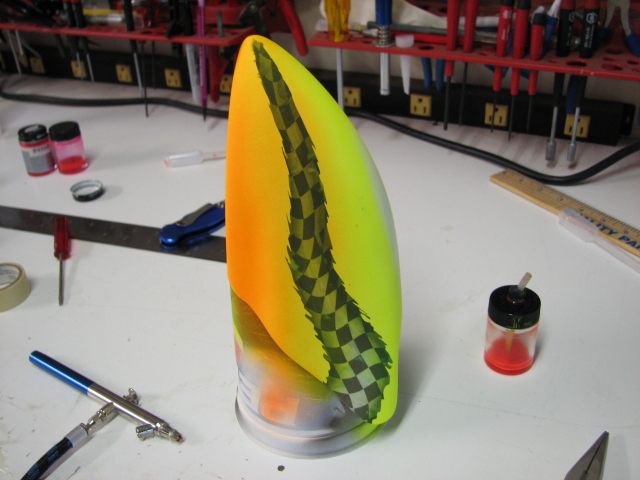
  1. Mask off the jagged edges of the checked flat
  2. Mask off the checkers
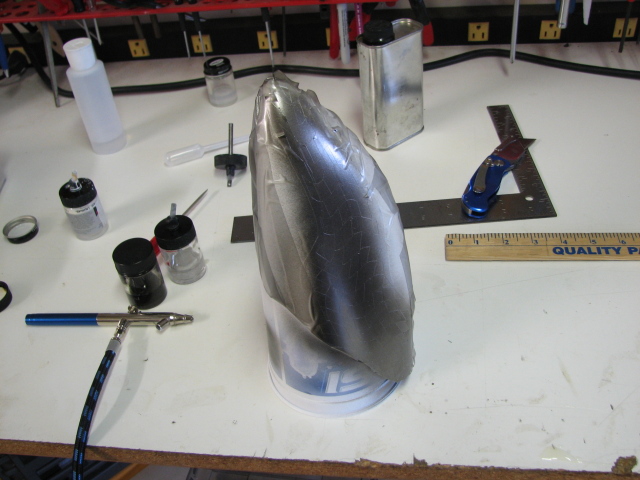
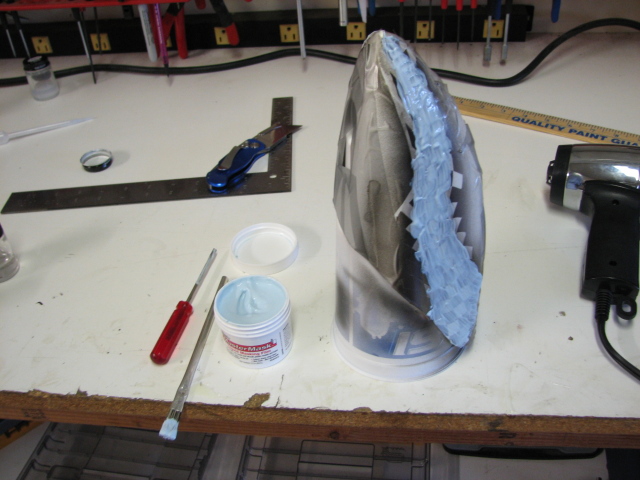
  3. Lay on some Indy Silver / Outlaw Black blend
  4. Peel off the checkers, and shoot a drop shadow around the edges of the flag
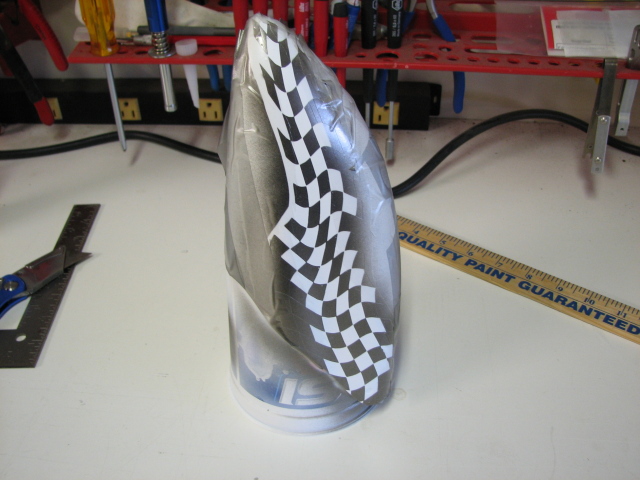
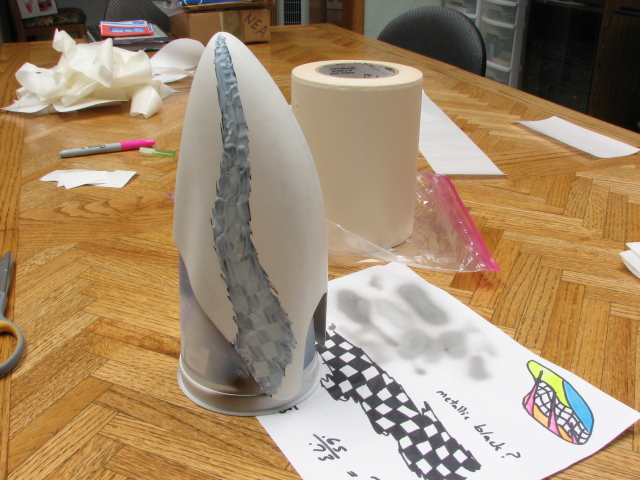
  5. I used some Hobbico Liquid Mask and masked off my jagged flag. Goes on as opaque, dries translucent.
  6. Removed the vinyl masking. Now I see some of the white paint peeling up.
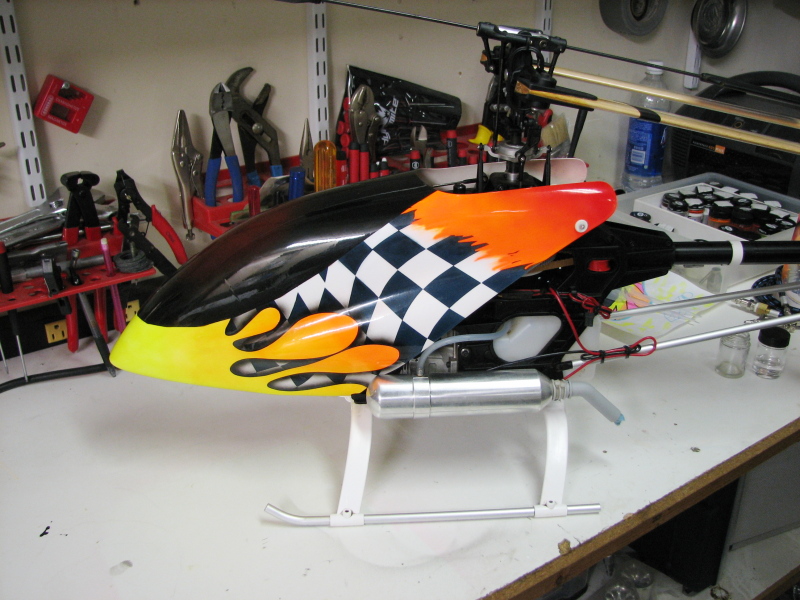
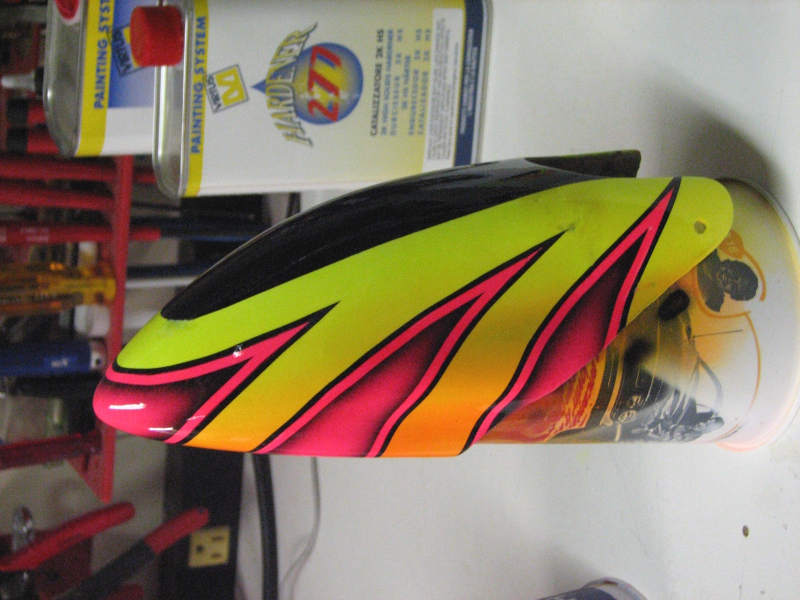
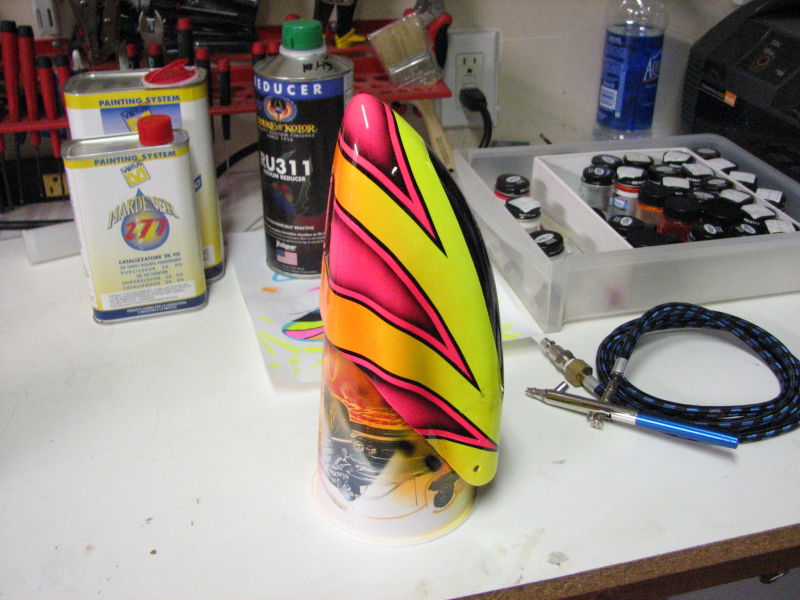
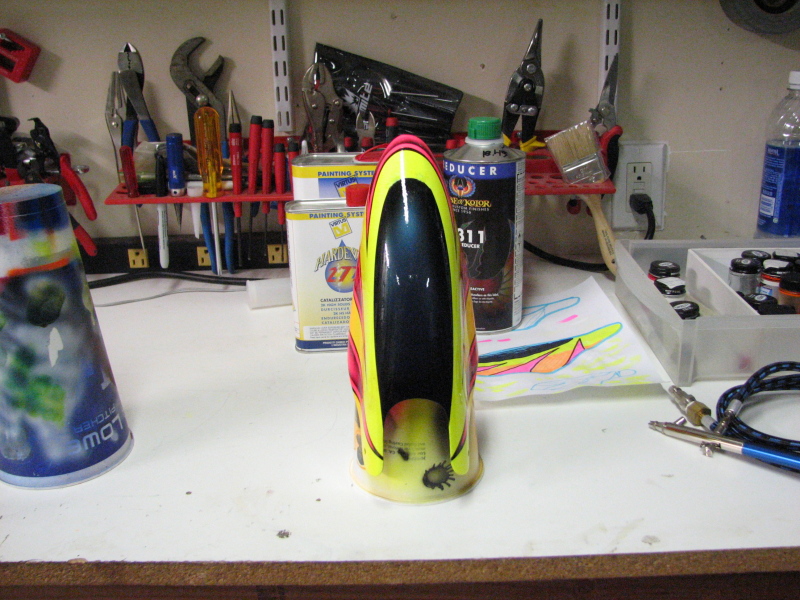
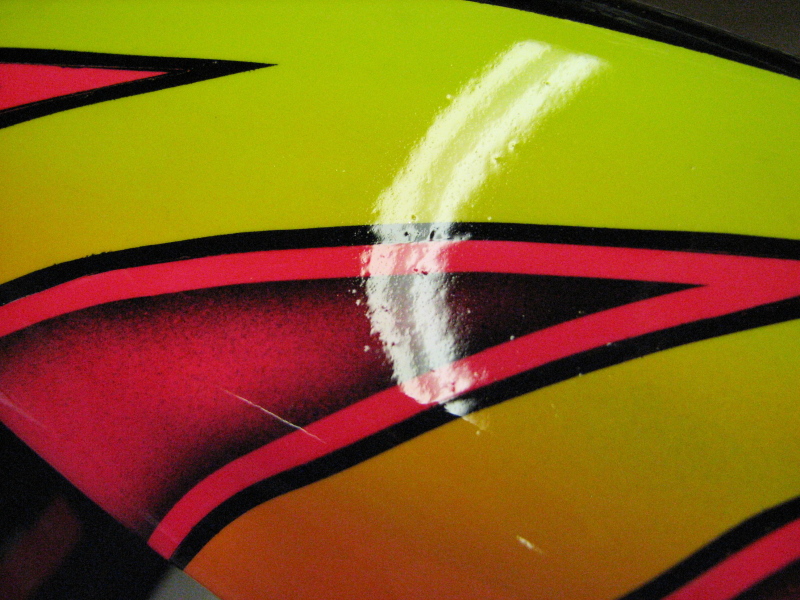
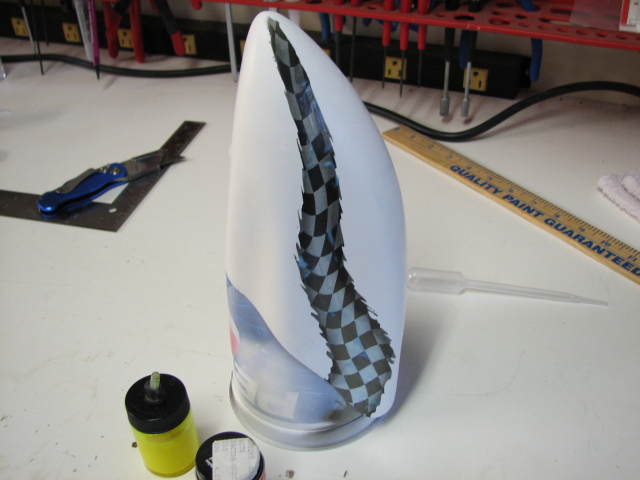
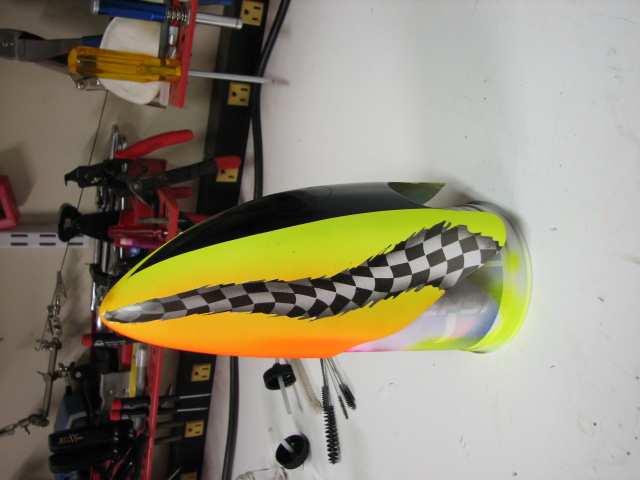
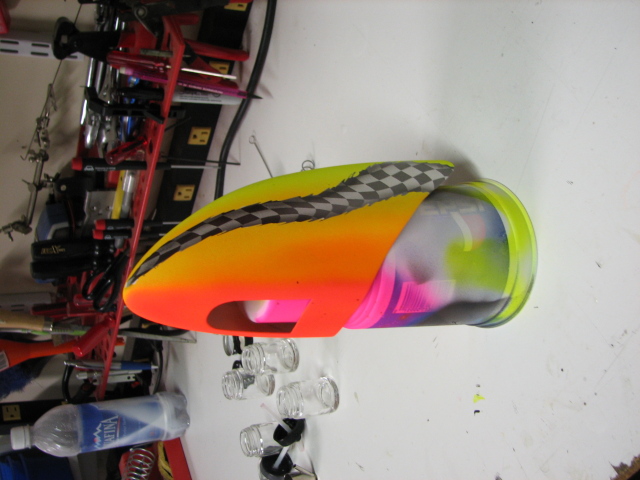
  7. Shoot the Fluorescent Yellow to Fluorescent Orange fade
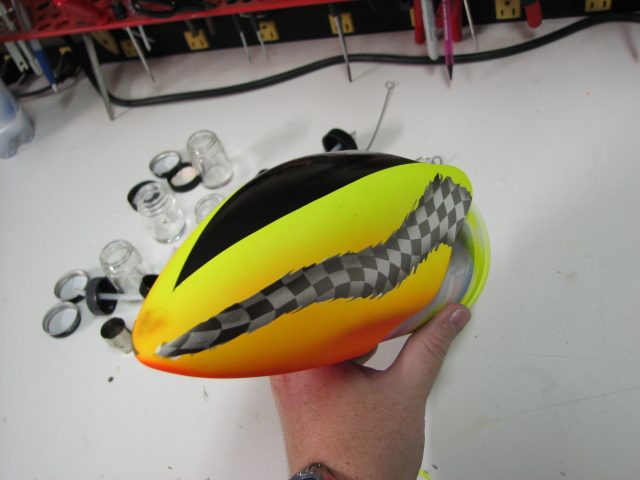
  8. Shoot a simple black windscreen, and some Fluorescent Red (turned out looking orange, because I did not want to mask it off and lay down some white for a background.)
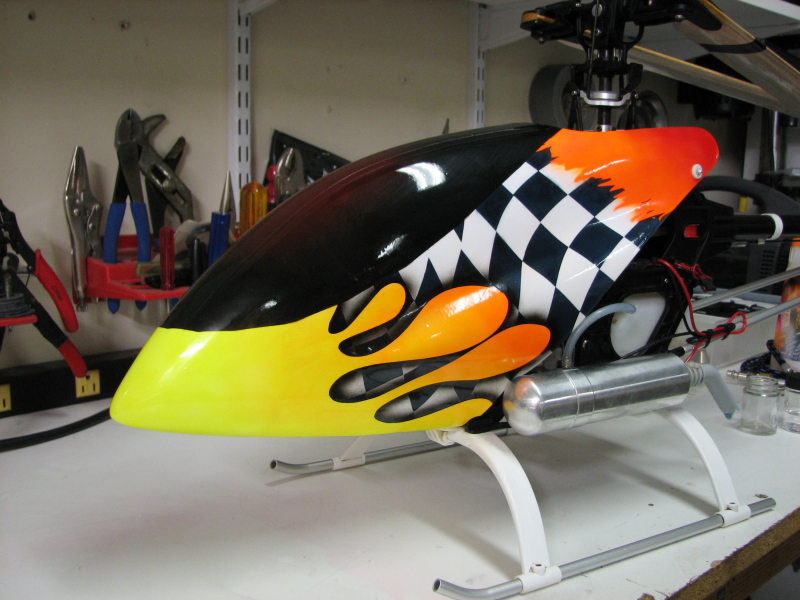
  9. It's done. All that is left is a quick clear coat. This canopy turn out like crap, so I'm just going to use some of the aerosol clear coat junk.

-Farrell

Rappy Canopy

I painted this several months ago, but just now realized I never posted photos. This is the first large canopy I ever painted, its an Align 600E canopy, for my TT Raptor 50 V2. It's also the first time I used my Roland SX-8 8" vinyl cutter to make some masks. I got a good deal on the cutter on eBay, and it came with a bunch of vinyl -- hence the flaming pink vinyl...

I did not realize how well regular vinyl would stick, so I managed to pull off some layers of paint when trying to remove my masks, and adhesive residue was left behind in many spots. After trying desperately to remove the residue, with everything from Goo Gone, to denatured alcohol, to Simple Green... I finally gave up and just shot my clear coat over it all before too much dust could stick to the residue. This made my canopy look like crap up close, but I can live with it for now. I'll just crash it all to soon anyway :)

-Farrell

Better Photos of the New Canopy

I got home just as the sun had set, and heres some decent shots of the new canopy mounted on my T-Rex 450:

-Farrell

Time to Paint Another Canopy

Well it has been a while since my last post. School and flying have been occupying my time, and I have managed to go through a few canopies in the course of learning loops, rolls, and the beginnings of inverted hovering. I was down to two poorly painted plastic canopies:

http://rcheliguy.com/index.php?entry=entry071009-170706

http://rcheliguy.com/index.php?entry=entry071009-165442

So I decided it was time to paint another canopy. I bought some cheap $12 fiberglass canopies from HeliDirect, and today I painted one of them. For the price the canopies aren't too bad, but they are very fragile near the edges. I decided to add some fiberglass to the inside to help strengthen it some, and it seems to have worked out very well from the feel of it.

After lots of doodling and browsing my folder of cool canopy images, I came up with this simple design:

I used Pactra paints (the stuff used to paint Lexan r/c car bodies) and a two part clear coat. I used fluorescent yellow and fluorescent orange for the background, flourescent red and outlaw black for the foreground, and a mix of indy silver, true blue pearl, and outlaw black for the windshield area, with outlaw black used to fade to black near the edges.

The windscreen area turned out very nice, but you can't really tell from the photos due to the poor lighting. When the clear coat cures I'll have to take some better pictures outside, with the canopy mounted on my heli.

It turned out pretty good, with a few annoying spots where paint got through my masking. Oh well, I'm learning more with each new paint job... I really need a cleaner place to paint, as I keep getting little bits of dust or junk stuck to the surface. I'm using a water trap on my air line, and I'm thoroughly cleaning the canopy before painting, but that doesn't save me from crap floating in the air. This is most aggravating with the clear coat, as it becomes very obvious if you look close.

I'd like to setup a makeshift paint booth and filter the air 24/7. Dreams...

-Farrell

Obscenely Large Receiver Pack for my XTM Mammoth ST Truck

This isn't heli related, but it was a cool project that I want to share...

I've wanted a larger receiver pack for my r/c cars for a while, and recently managed to [strike]waste[/strike] ... I mean [i]skillfully[/i] use some time making a 7.4V (2 cell LiPo) 2400mAh receiver pack! The Mammoth ST has separate compartments for the receiver and the receiver battery, and if you put the battery where the receiver normally goes, you can fit a really large pack. All I had to do was a little shaving away at some of the plastic to make room for wires.

I was originally going to make a custom 5 cell AA pack out of some 2500mAh NiMHs, but after some testing, none of the high capacity NiMH AA's live up to their rating. After five cycles of charging at 1/2C, and discharging at 1C, they did not discharge more than 1800-2000mAh. The high capacity AA's also have a ridiculously high self-discharge rate...

Three of the 2S 800mAh LiPo's for the EF MASH heli fit perfectly in the receiver box. It's almost like it was designed for it! :) I shrink-wrapped the three LiPo's together and wired them so that I could charge each battery individually (and balance the cells) yet still use just one connector between the packs and the voltage regulator (Castle Creations CC-BEC.) This is the reason for why I chose to use the Multiplex green plugs. The six leads are kept isolated from each other unless you plug it into the CC-BEC.

I also used some shrink-wrap around the mess of wires to act as a strain relief, and to minimize the possibility of pinching one of the many wires. Everything kind of fell into place surprisingly easy, and this is the end result:

I chose to remove the switch harness, as I prefer to unplug the battery instead, especially when the plug is so easy to reach. This project was done just for the fun of it, since its not really practical to spend a lot of money on LiPo's and a CC-BEC... but I think I'll enjoy running 10 tanks or more in between charges!

-Farrell

Visiting Southern California?
You might like these places: